3.0 KiB
Rainbow Serial Bumper
Just a little bit of extra bling for your Voron Trident
Bill of Materials
| Component | Qty | Note |
|---|---|---|
| M3x8 SHCS | 2 | for mounting |
| 2020 M3 T-Nut | 2 | for mounting |
| 10mm High Density RGB COB Strip | 50mm | https://www.aliexpress.com/item/1005005486743999.html |
Printing
[a]_main_body.stl
Print in your accent color of choice. Darker colors do a better job of preventing the light from bleeding through, using a high infill percentage can also help.
This part is already oriented correctly for printing and requires no slicer supports.

After printing remove the support piece.

[o]_insert_collar.stl
Print in black or another dark color.
This part is already oriented correctly for printing and requires no slicer supports.

After printing remove the support pieces.

[o]_back_plate.stl
Print in black or another dark color.
This part is already oriented correctly for printing and requires no slicer supports.

[oc]_insert.stl
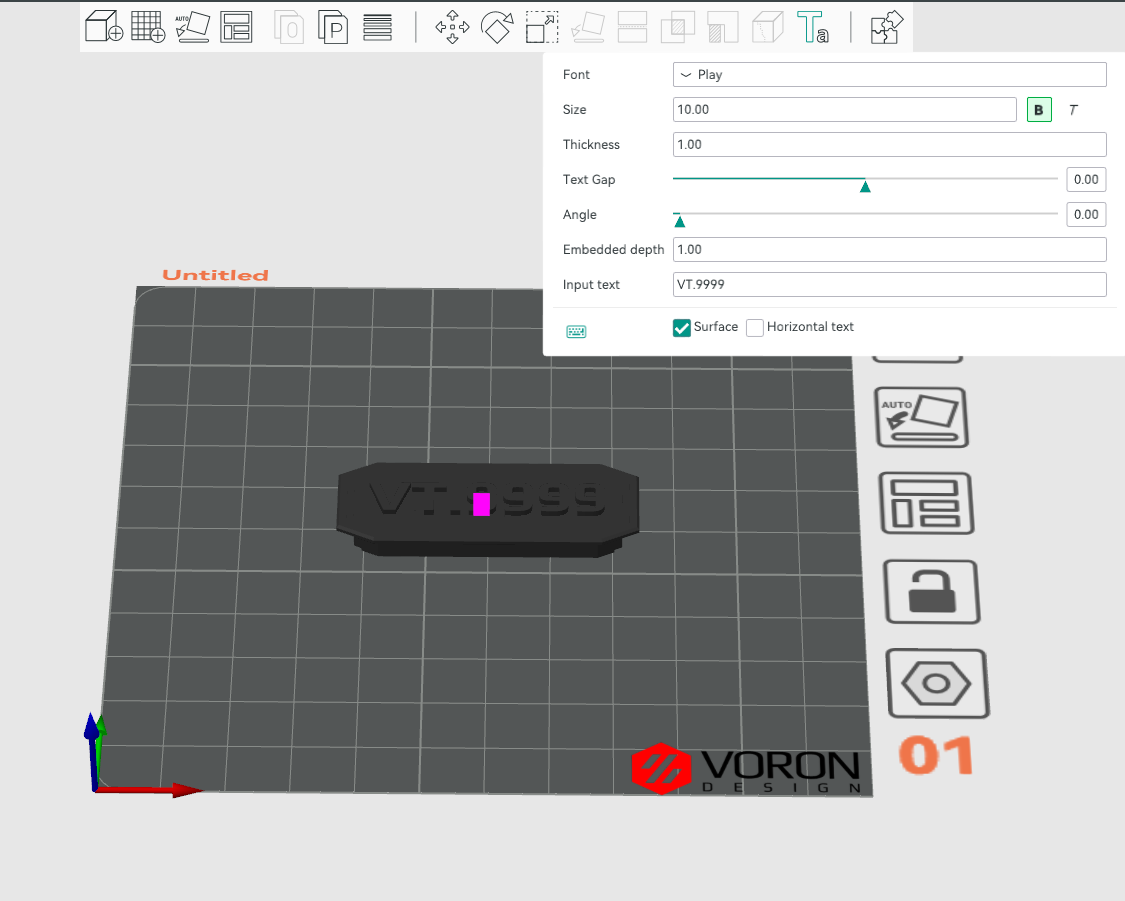
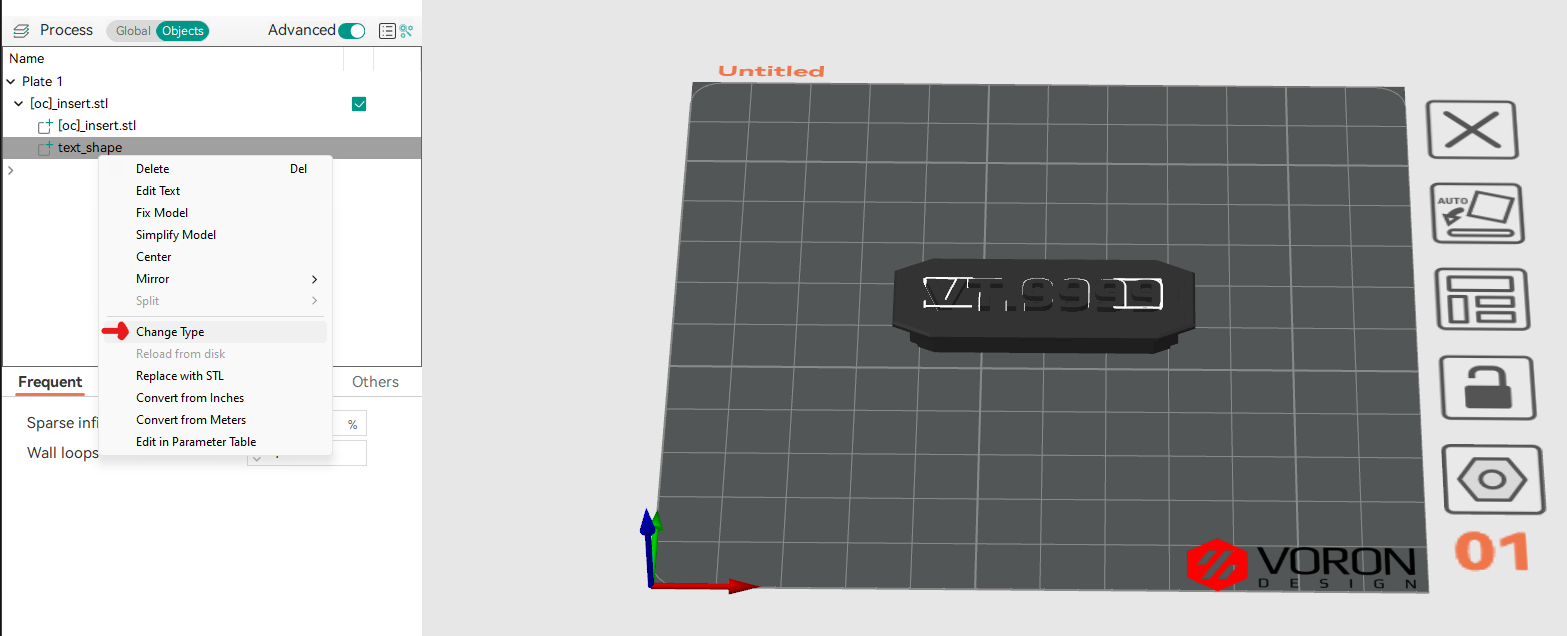
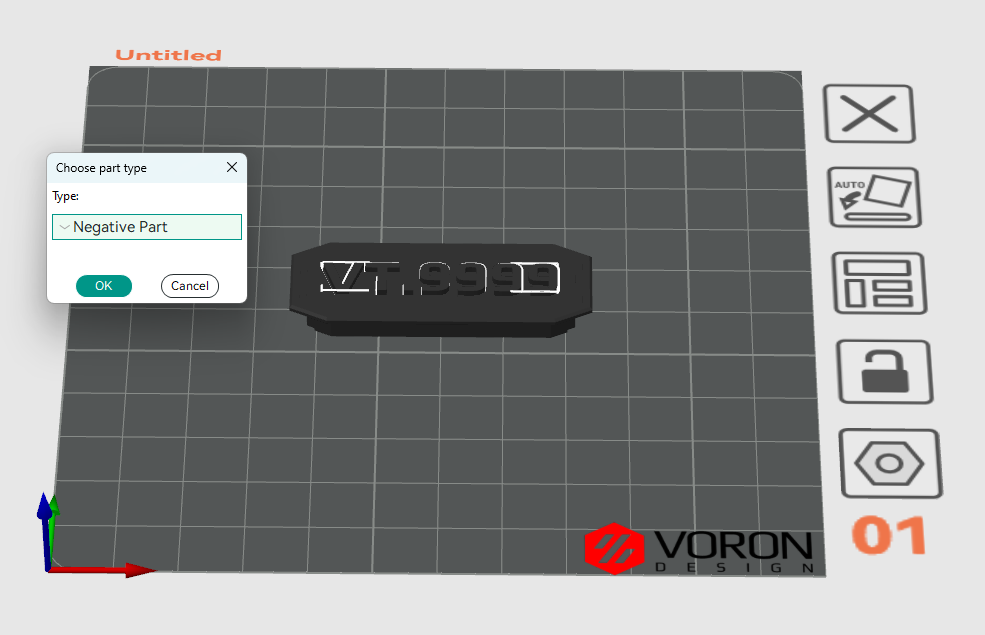
Step 1 - Adding the text
Engrave the text 1mm into the surface of the part. Orca Slicer is shown below, but the process should be similar in other slicers.
The recommended font is Play Bold (aka "The Voron Font")
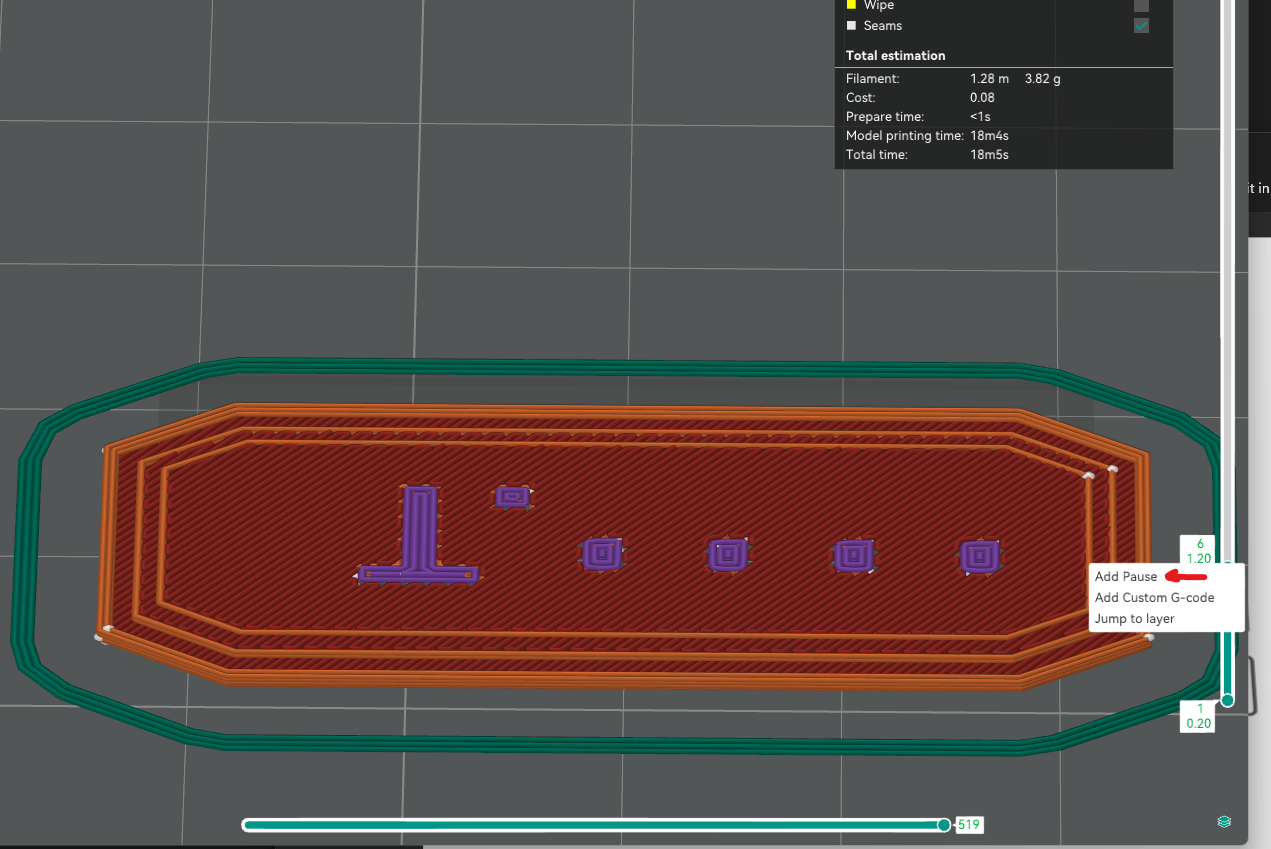
Step 2 - Preparing to print
This is where the magic happens. You'll need a black/dark filament, and a clear filament that will stick to eachother. I used black and clear polymaker PETG.
Flip the part over 180 degrees.
Slicer Settings
For best results:
- 1 perimeter
- 0 top & bottom laters
- 100% Aligned Rectilinear infill
Slice the part, and insert a pause after 1mm, this is where you will switch from dark to clear filament.
Assembly
Press the Insert into the Main Body, and then press the collar in the gap.

Solder the LED wiring, and insert the LED strip, followed by the back plate.

Installation
Install on the front bed extrusion of your Voron Trident, or anywhere else you think it would look cool.
