* Create add * Create readme.md * Delete add * Create stt * Add files via upload * Delete stt * Create O * Add files via upload * Delete O * Update readme.md * Rename printer_mods/Printopal/Magnetic top panel/readme.md to printer_mods/Printopal/Magnetic_top_panel/readme.md * Update README.md * Update README.md * Create OB * Add files via upload * Create Check * Add files via upload * Delete printer_mods/Printopal/Magnetic top panel directory * Update README.md * Update README.md * Delete 250_top_skirt_220.obj * Delete printer_mods/Printopal/Magnetic_top_panel/OBJ directory * Create O * Add files via upload * Delete O * Add files via upload * Delete printer_mods/Printopal/Magnetic_top_panel/OBJ_STL directory * Create STL * Add files via upload * Delete STL * Delete printer_mods/Printopal/Magnetic_top_panel/STEP directory * Create STEP * Add files via upload * Delete STEP * Update readme.md * Create img * Add files via upload * Delete img * Update readme.md * Update readme.md * Add files via upload * Update readme.md * Update readme.md * Update readme.md * Update readme.md * Update readme.md * Update readme.md * Update readme.md * Update readme.md * Delete Magnetic_Top_Panel.mp4 * Add files via upload * Update readme.md * Update readme.md * Update readme.md * Delete Magnetic_Top_Panel.mp4 * Update readme.md * Update readme.md * Update readme.md |
||
|---|---|---|
| .. | ||
| Images | ||
| STEP | ||
| STL | ||
| readme.md | ||
readme.md
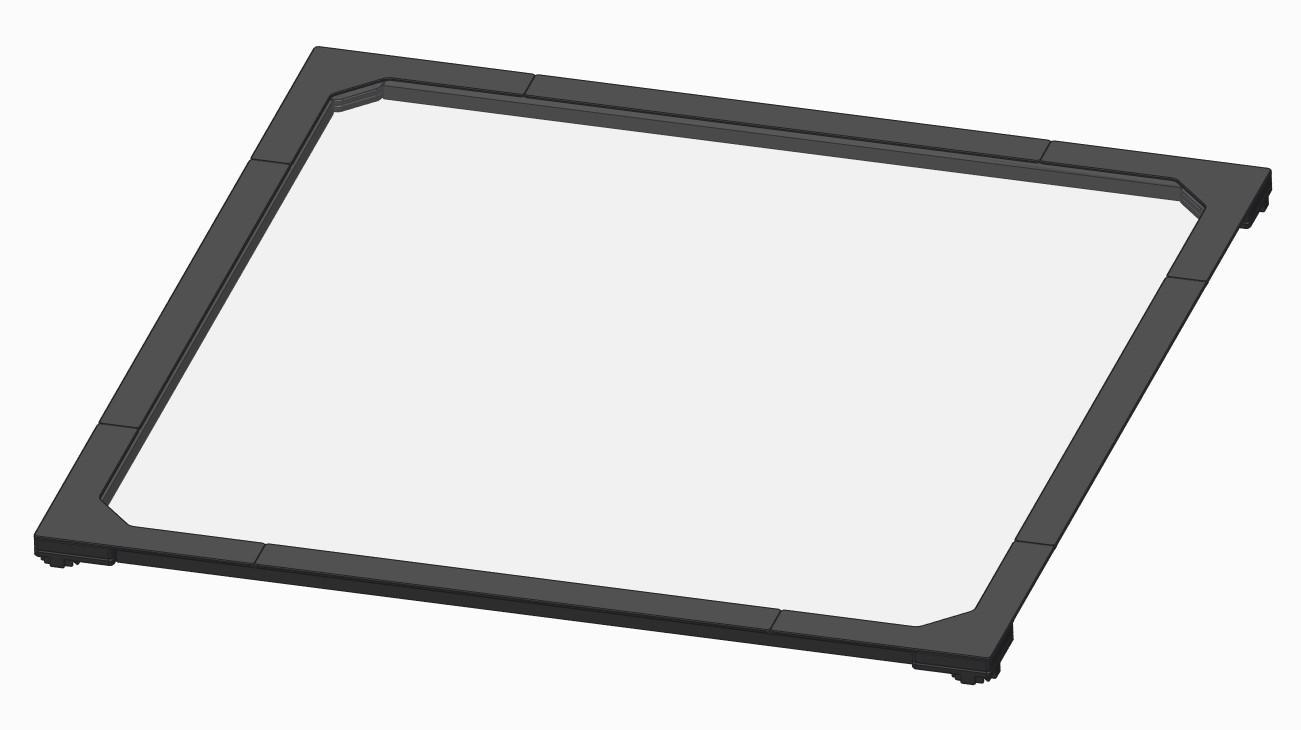
Magnetic top panel
Overview
This top panel can be easily removed for printer maintenance or giving more cooling. 3D models are designed to match your buildplate size. For versions 1.8 and 2.4 in 250, 300 and 350mm.
BOM
250:
400 x 400 x 3mm acrylic panel sheet
4x 344mm of 6 x 11,7mm [1/2” x 1/4”] High density foam
300:
450 x 450 x 3mm acrylic panel sheet
4x 394mm of 6 x 11,7mm [1/2” x 1/4”] High density foam
350:
500 x 500 x 3mm acrylic panel sheet
4x 444mm of 6 x 11,7mm [1/2” x 1/4”] High density foam
Core:
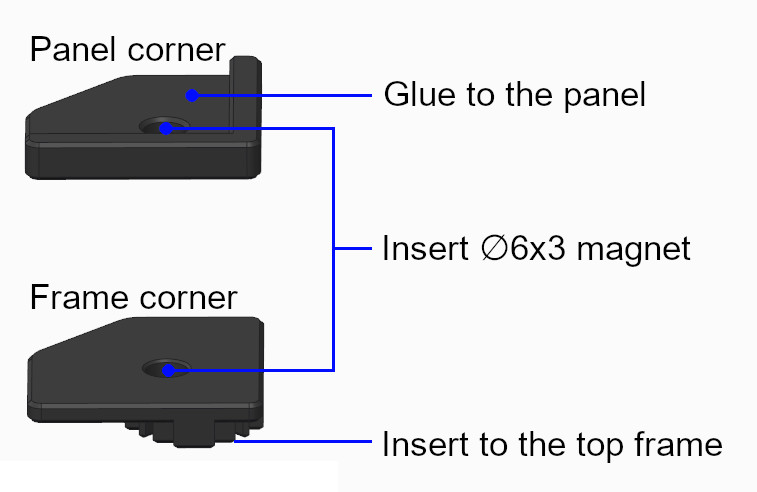
8x Ø6 x 3mm neodymium magnet
Acrylic sheet with abrasion resistant coating may be considered for V1.8 to prevent micro scratch caused by the reverse bowden tube. This may also appear with full height prints on V2.4. I don’t recommend using glass plate because of its weight, this may result in broken top skirt and broken glass!
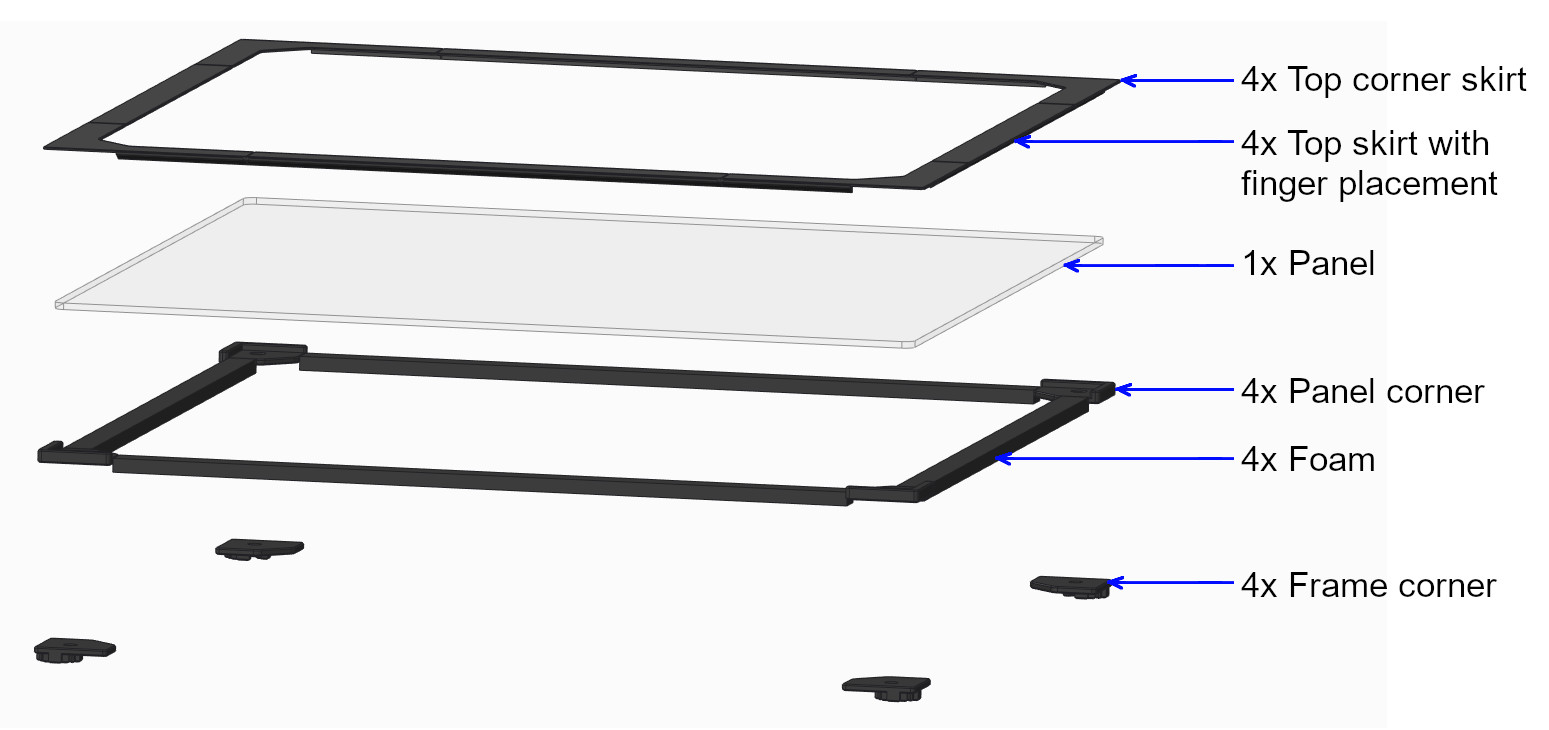
Instructions
- Insert magnets into panel corner and frame corner respecting their polarity.
- Insert frame corner on top of the 4 vertical 2020 extrusions.
- Put panel corner on frame corner, sides should be flush.
- Glue* the acrylic panel sheet on panel corners, be sure to keep panel corner and frame corner sides flush while gluing the acrylic panel.
- Remove the panel from the frame, adjust foam length and glue it under the acrylic panel sheet (same side as panel corner).
- Glue* top corner skirt on the acrylic panel sheet.
- Adjust top skirt length and glue* on the acrylic panel sheet. You can easily adjust the length in your slicer.
* Any liquid super glue works fine, be sure to not use VHB tape as you will add an extra height that will cancel the foam seal.