* Create hoschi * Delete hoschi * Create README.md * Add files via upload * Create .gitignore * Delete .gitignore * Create .dir * Add files via upload * Delete .dir * Create .del * Add files via upload * Delete .del * Delete spider_spacer_x4.stl * Delete spider_bracket_vertical_usb.stl * Delete spider_bracket_vertical_usb.step * Delete spider_bracket_vertical_terminal.stl * Delete spider_bracket_vertical_terminal.step * Delete spider_bracket_horizontal_usb.stl * Delete spider_bracket_horizontal_usb.step * Delete spider_bracket_horizontal_terminal.stl * Delete spider_bracket_horizontal_terminal.step * Delete spider.spacer.step * Create .del * Add files via upload * Update README.md * Add files via upload * Update README.md * Added printed FYSETC Spider DIN Rain Mount * Update README.md * Add files via upload * Add files via upload * Add files via upload * Add files via upload * Update README.md * Add files via upload * Add files via upload * Delete horizontal_rail.jpg * Delete vertical.rail.jpg * Delete .del * Update README.md * Update README.md * Update README.md * Delete vertical.rail.jpg * Update README.md |
||
|---|---|---|
| .. | ||
| IMG | ||
| STEP | ||
| STL | ||
| README.md | ||
README.md
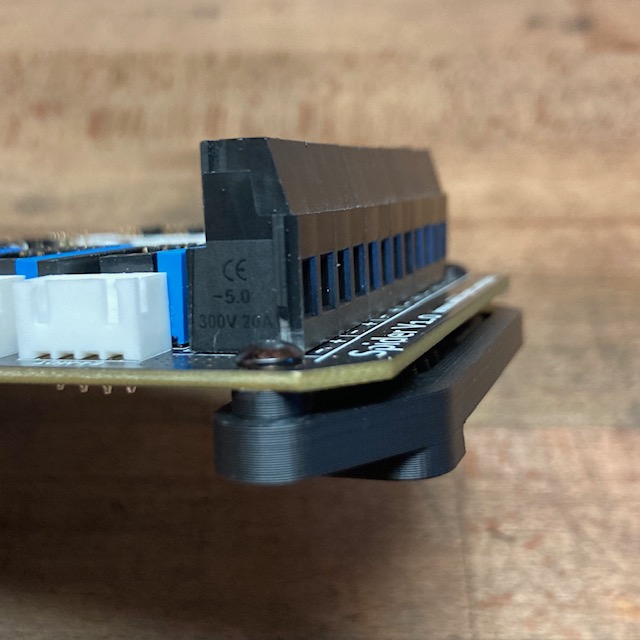
FYSETC Spider DIN Rail Mount
for horizontal or vertical mounting

Required materials:
for horizontal mounting:
- 1x printed bracket terminal side of the Spider Board: spider_bracket_horizontal_terminal.stl
- 1x printed bracket USB-Port side of the Spider Board: spider_bracket_horizontal_usb.stl
for vertical mounting:
- 1x printed bracket terminal side of the Spider Board: spider_bracket_vertical_terminal.stl
- 1x printed bracket USB-Port side of the Spider Board: spider_bracket_vertical_usb.stl
for both types:
- 4x printed spacers: spider_spacer_x4.stl
- 4x M3 x 8mm BHCS/SHCS
- 4x M3 x 4mm threaded inserts
Assembly:
Put the four screws through the Spider Board mounting holes and screw it into the spacers. The spacers are intentionally tight so that you don't have to fiddle the spacers between the board an the DIN Mount.


Then screw the board on evenly on the mounts.

Note: The mounting holes on the Spider board are very tight for M3 Screws. I drilled the holes out with a 3.2mm drill bit, but don't encourage anyone to do so, because - reasons.
Disclaimer: It is your printer. If you do this and something breaks or if someone gets hurt, it is fully your responsibility. I take no responsibility.
In case of doubt ping me on Discord hoschi#0238